Here is an example of a 8,680 square foot custom contract house with an 8/12, 12/12, 16/12 multi pitch, multi styled roof system. At this stage of construction the framing crew, using the Roof Framing Solutions method, as shown in the following pictures, was able to continue progress on the house while having the Roof System material delivered and then cut and build the entire Roof System in 6 days
1
Day
The roof framing material was delivered with the Roof Framing Material Layout, Roof System Rafter Cut List and the Roof System Rafter Layout Plan. With the information provided by Roof Framing Solutions a (2) man cut team immediately started cutting the roof while the rest of the crew finished the ceiling and started the exterior wall sheathing.
2
Day
The entire roof was cut, numbered, stacked and ready to be moved into place. The exterior wall sheathing was finished, stopping below the ceiling, and the roof kneewalls were started.
3
Day
All the roof kneewalls were framed and braced and the exterior wall sheathing was safely finished connecting the roof kneewalls with the lower level walls. The scaffolding was built, ridges were cut and laid out with the kneewalls. The pre-cut rafters were then moved to their designated location.
4
Day
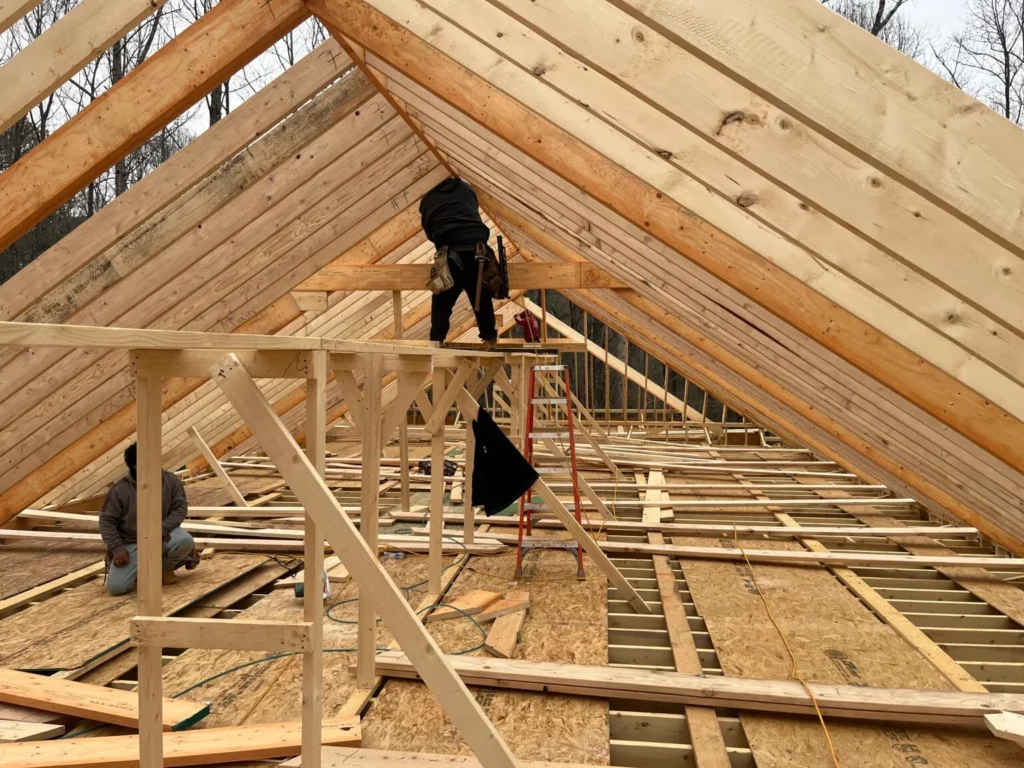
With all the scaffolding built, ridges laid out and all the rafters moved into place the Framing crew started assembling the roof. By the end of the first day of assembly they were able to set and fill in 90% of the roof system.
5
Day
The roof system was completely filled in and finished. With a Roof Framing Solutions structural design there is no need for roof bracing, so the crew was able to start sheathing the roof even as it was being completed.
6
Day
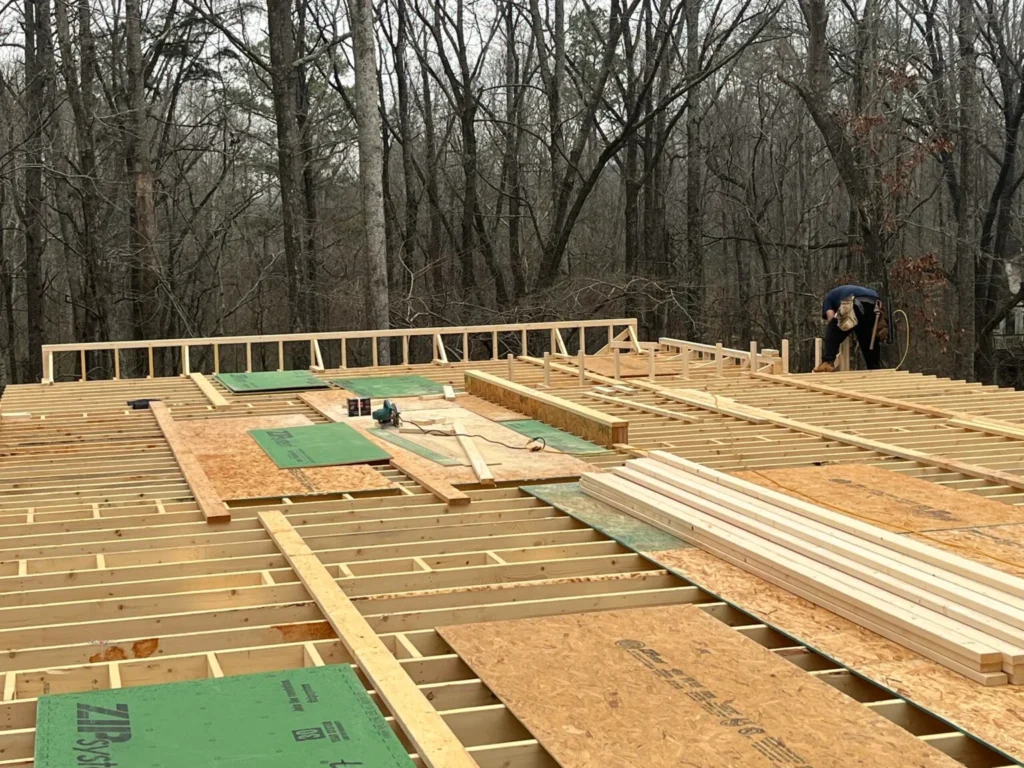
The roof sheathing was finished and the Roofing crew was able to start “ Drying In “ the house.
Detailed overview of 6 days
Pic 1
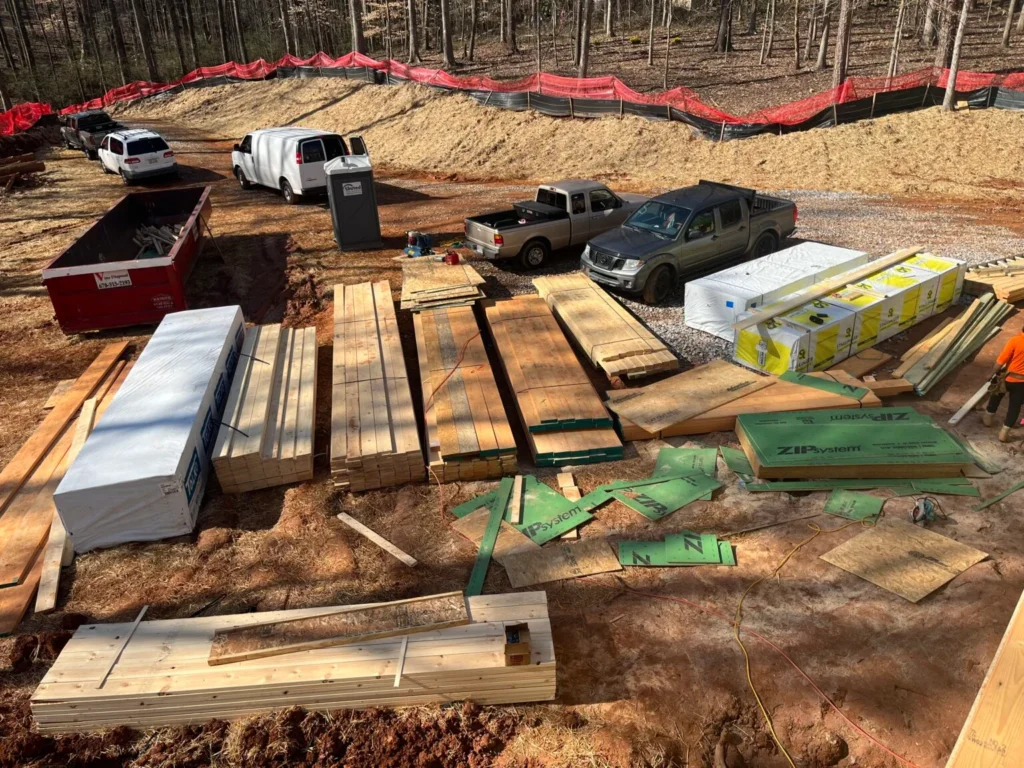
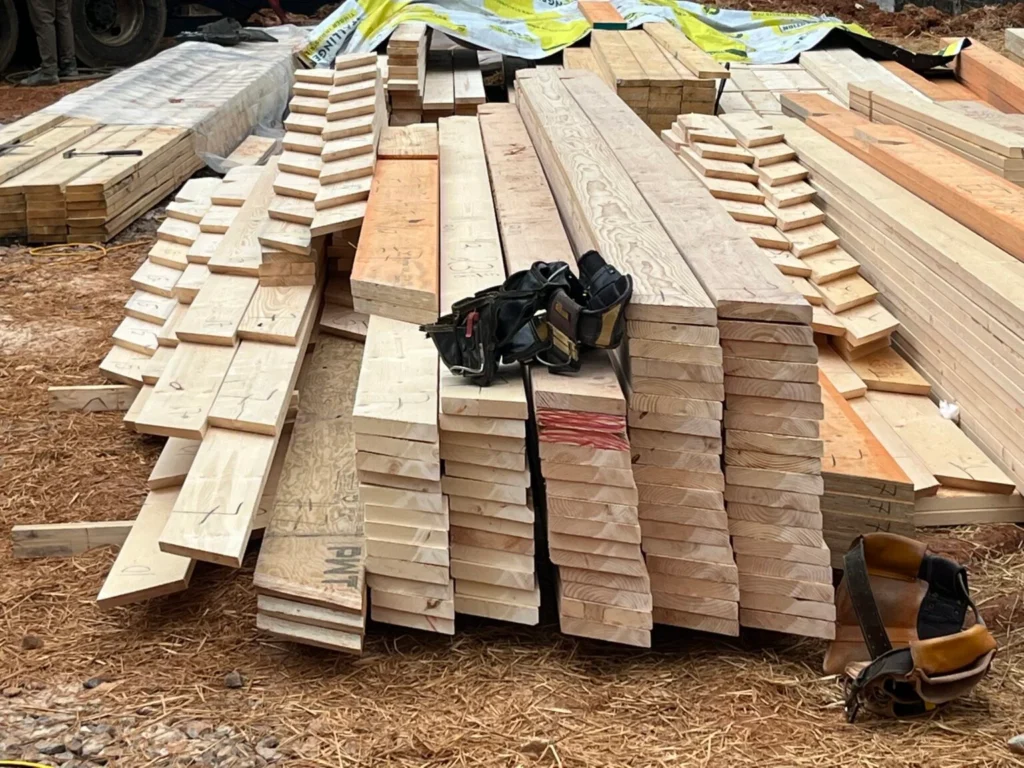
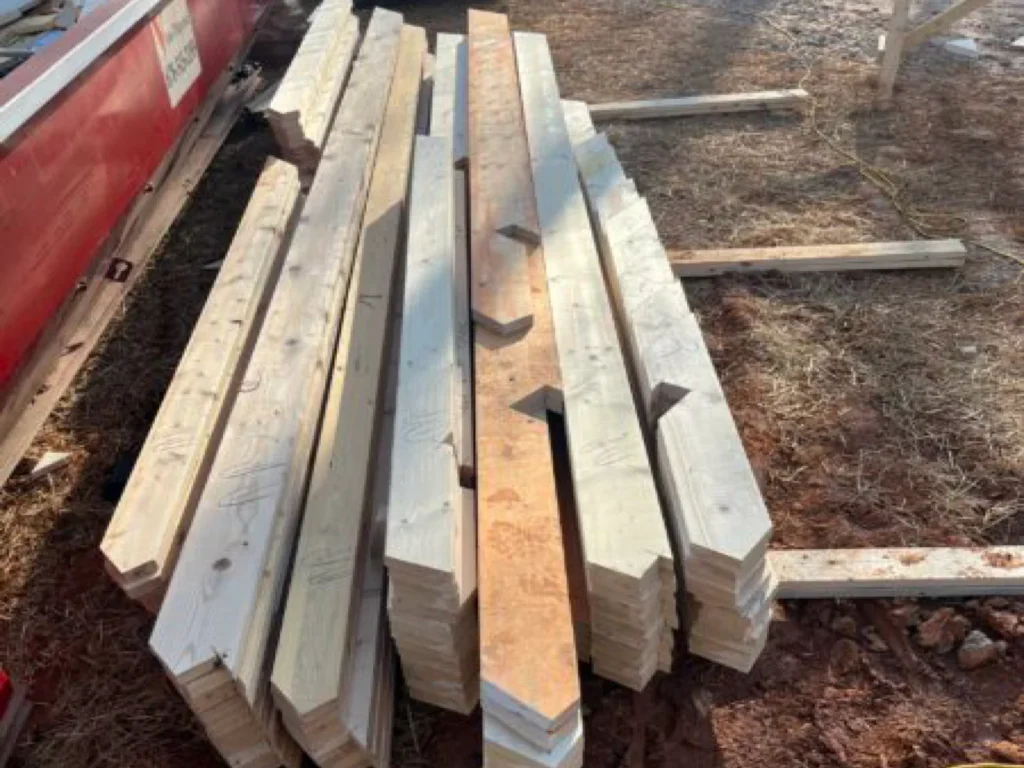
With a complete Roof Framing Material List the Lumber Supplier was able to pre-stock and deliver the entire Roof package in one organized drop in a designated area.
Pic 2
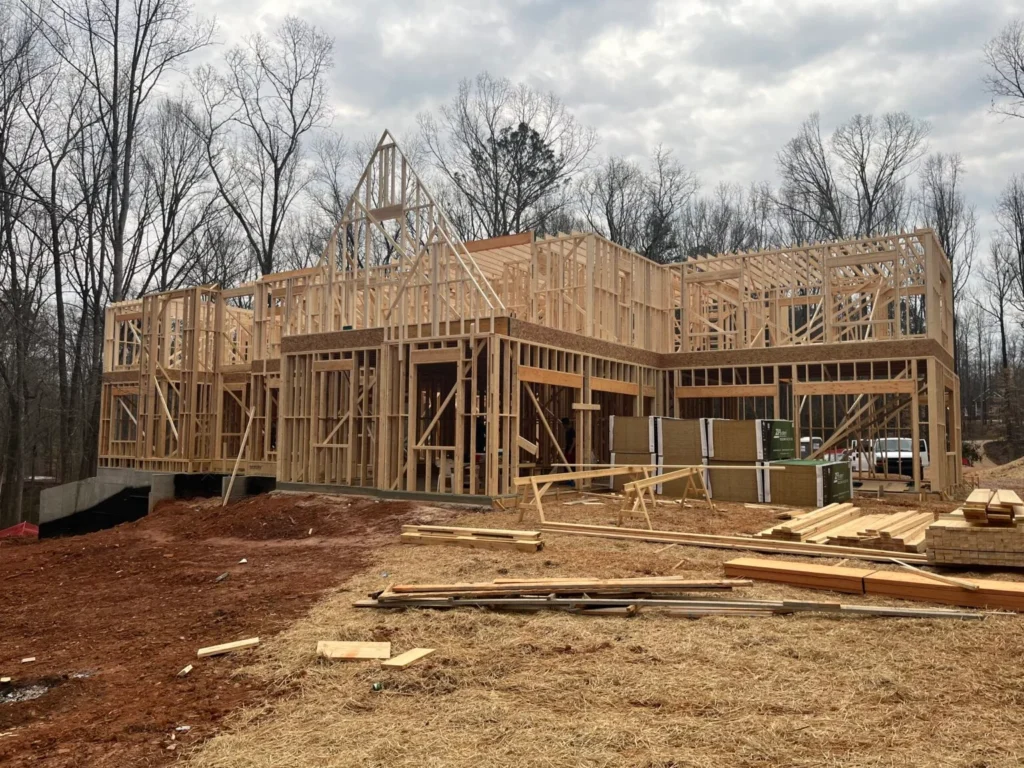
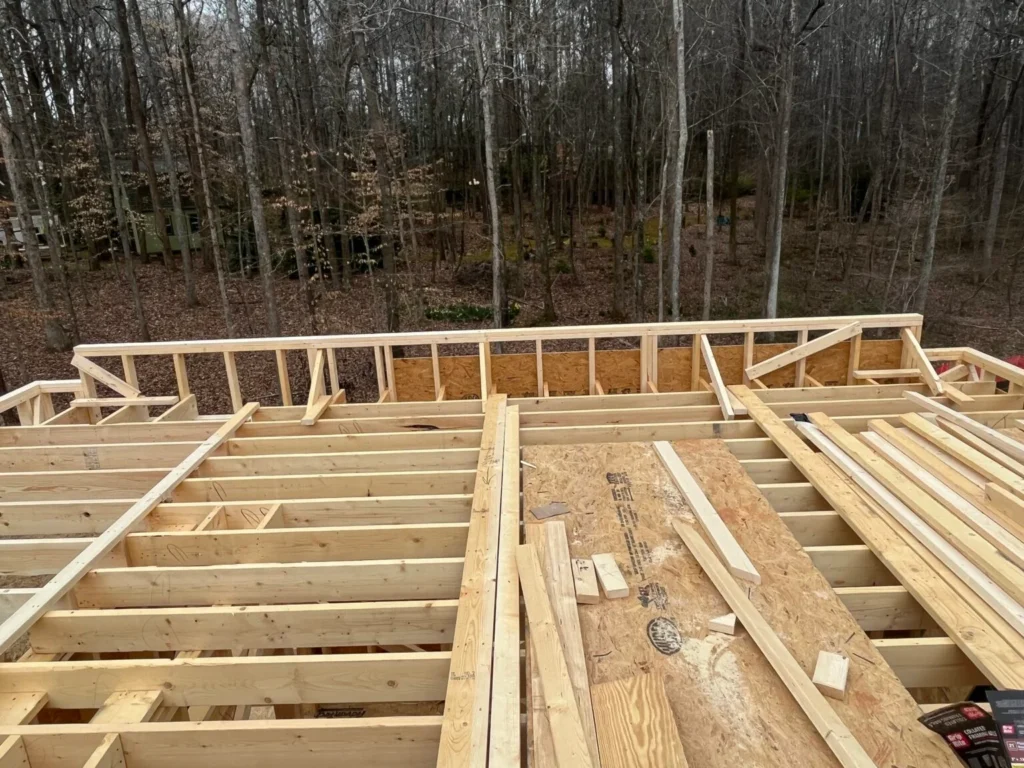
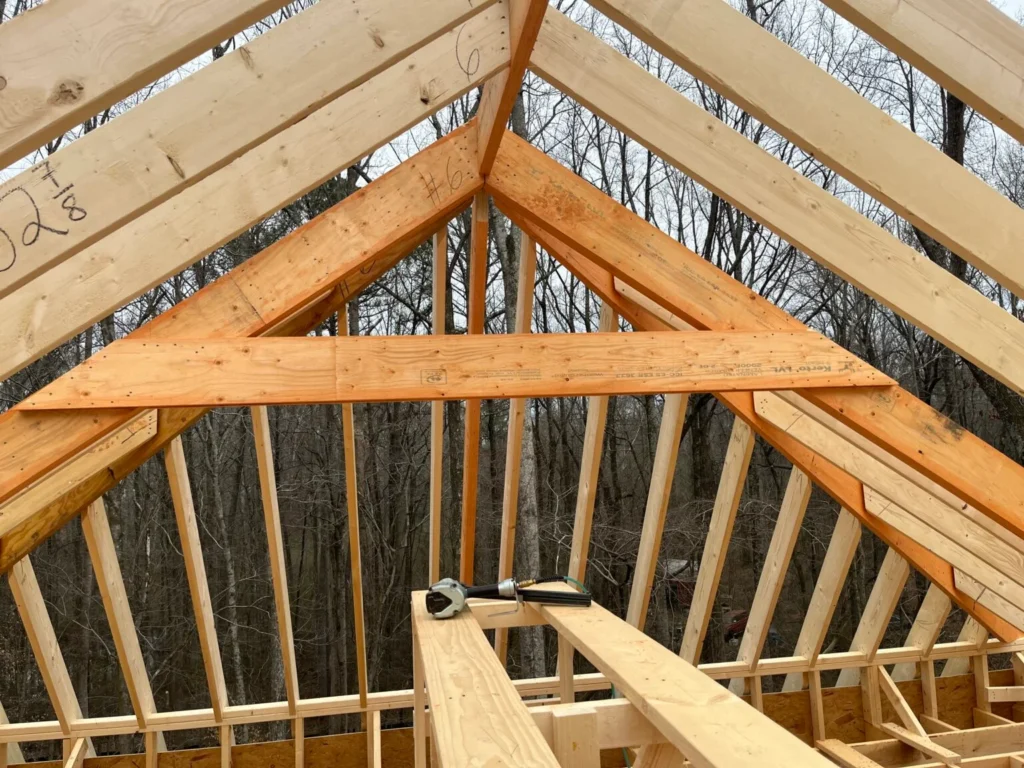
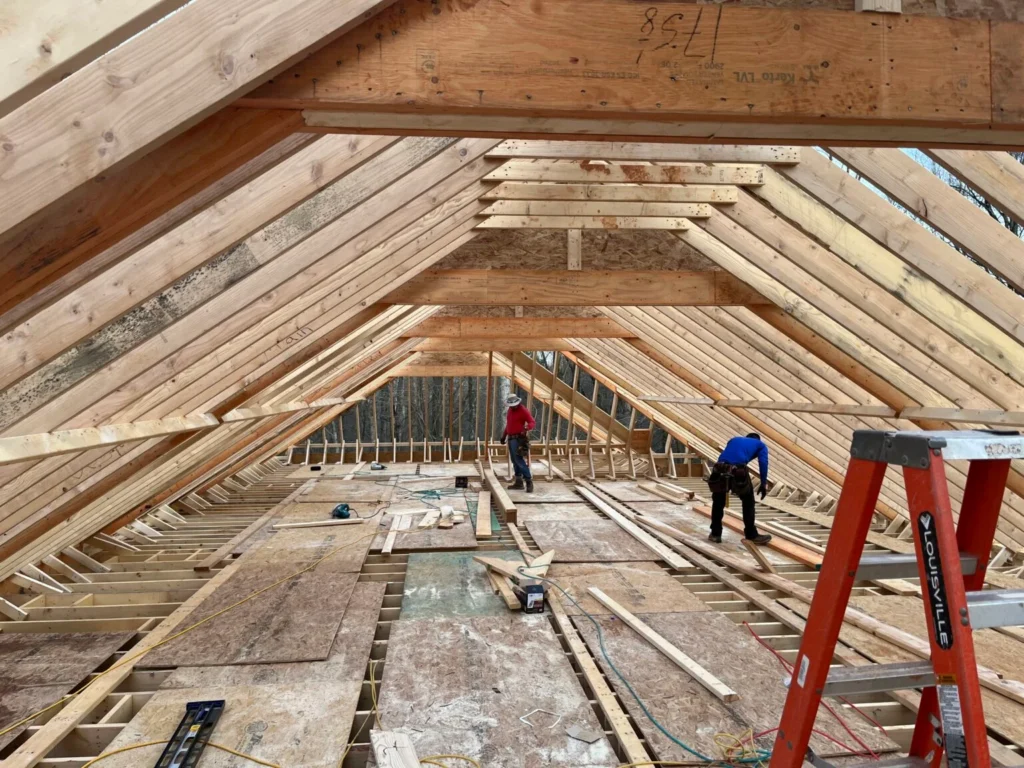
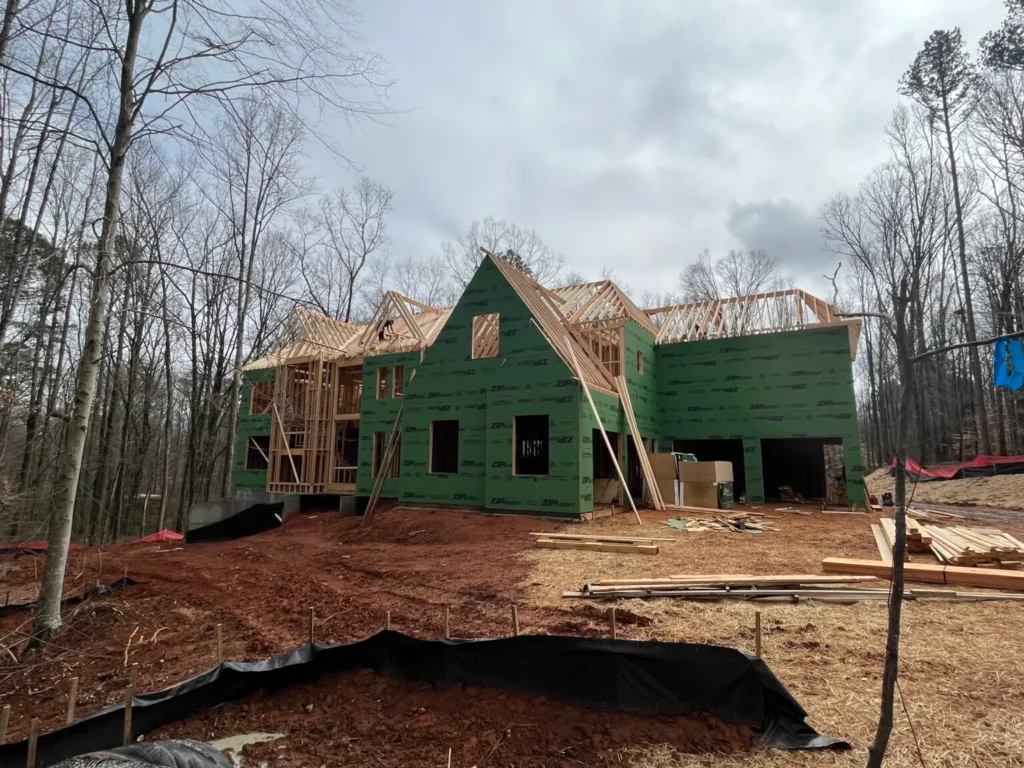
Front and rear elevations on the third day of wooden roof work show a continuous 16” on-center stacked layout. Roof Framing Solutions’ system mirrors this, aligning each rafter directly over the studs.
Pic 3
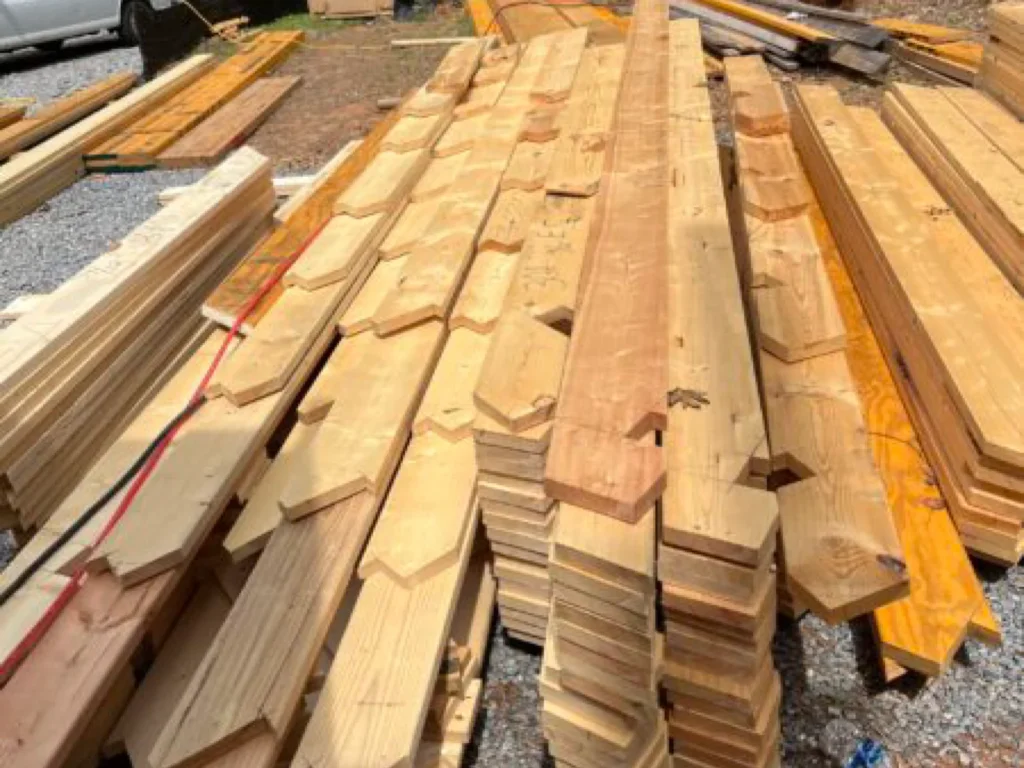
With a complete Roof Framing Material List the Lumber Supplier was able to pre-stock and deliver the entire Roof package in one organized drop in a designated area.
Pic 4
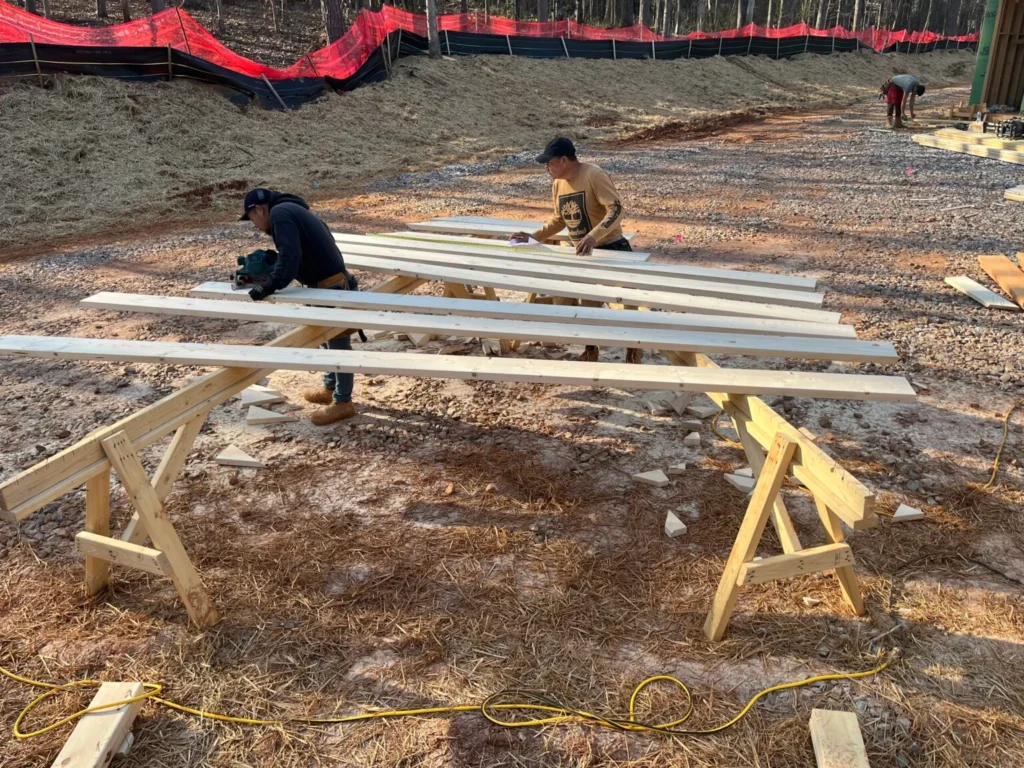
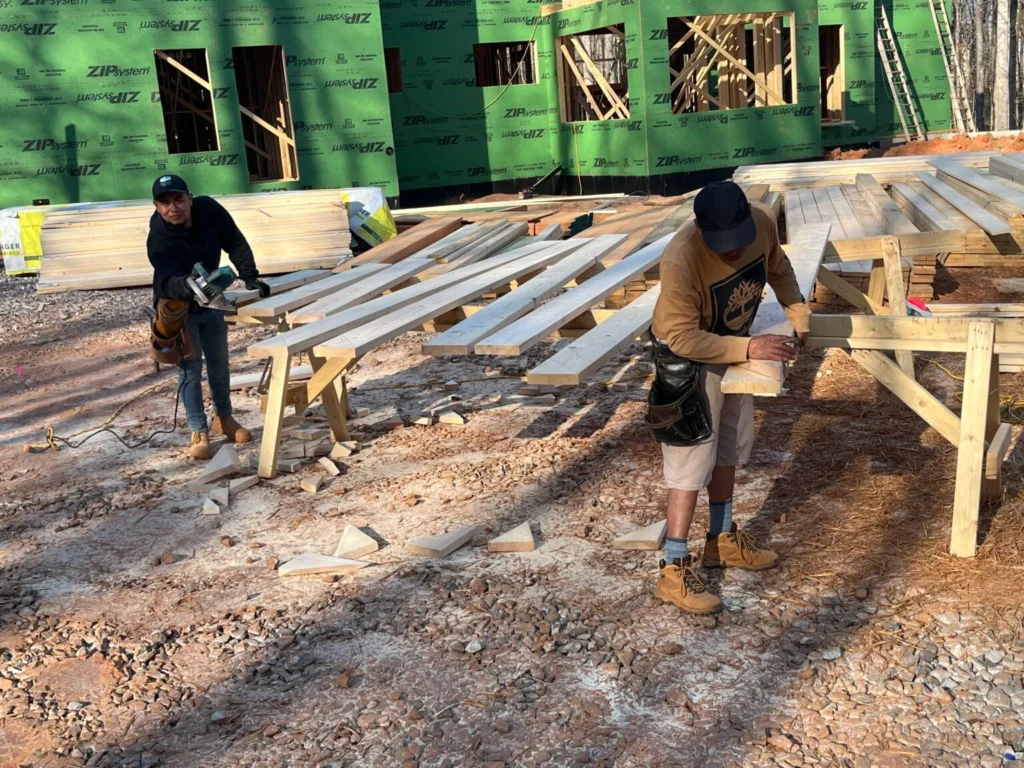
Using the detailed Roof System Rafter Cut List written in The Framers Language the cut team started laying out and cutting the Roof while the rest of the crew continued framing and preparing for the Roof
Pic 5
Lumber is being cut on-site as part of the wooden roof construction process. Each piece is carefully measured and shaped to ensure precise alignment within the roof framing system.
Pic 6
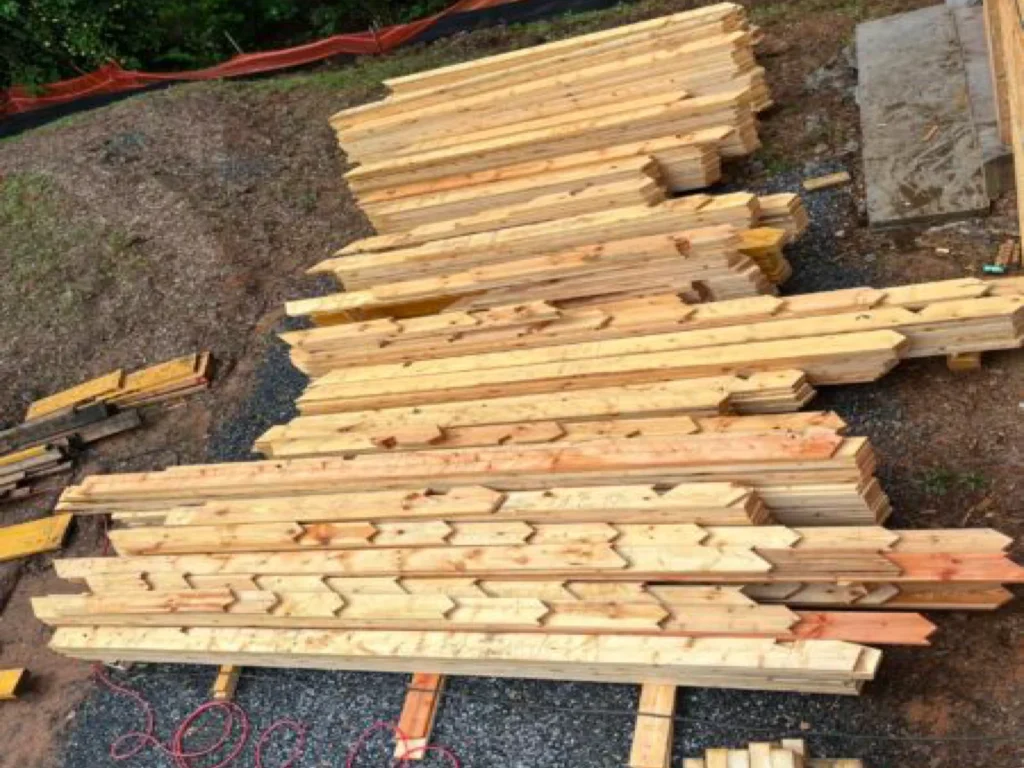
Following the Roof System Rafter Cut List each Roof component is cut, numbered and marked following the Roof System Rafter Layout Plan. After each Roof Section has been numbered and marked it is then moved to a staging area.
Pic 7
Pic 8
Pic 9
Pic 10
Pic 11
Pic 12
Pic 13
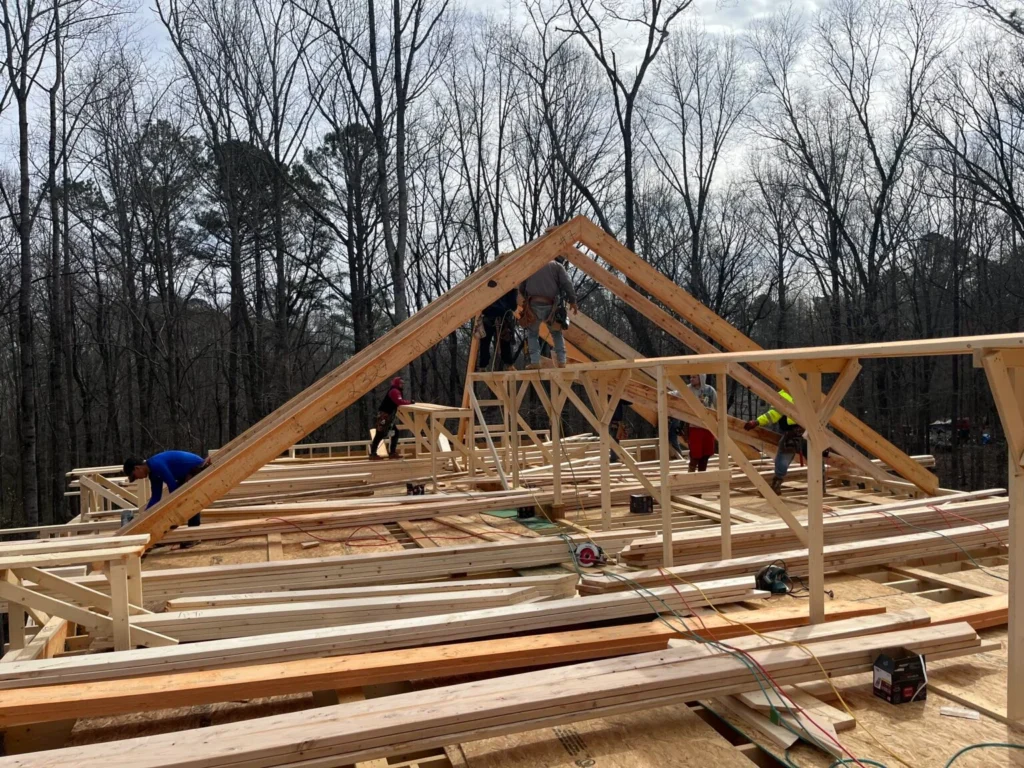
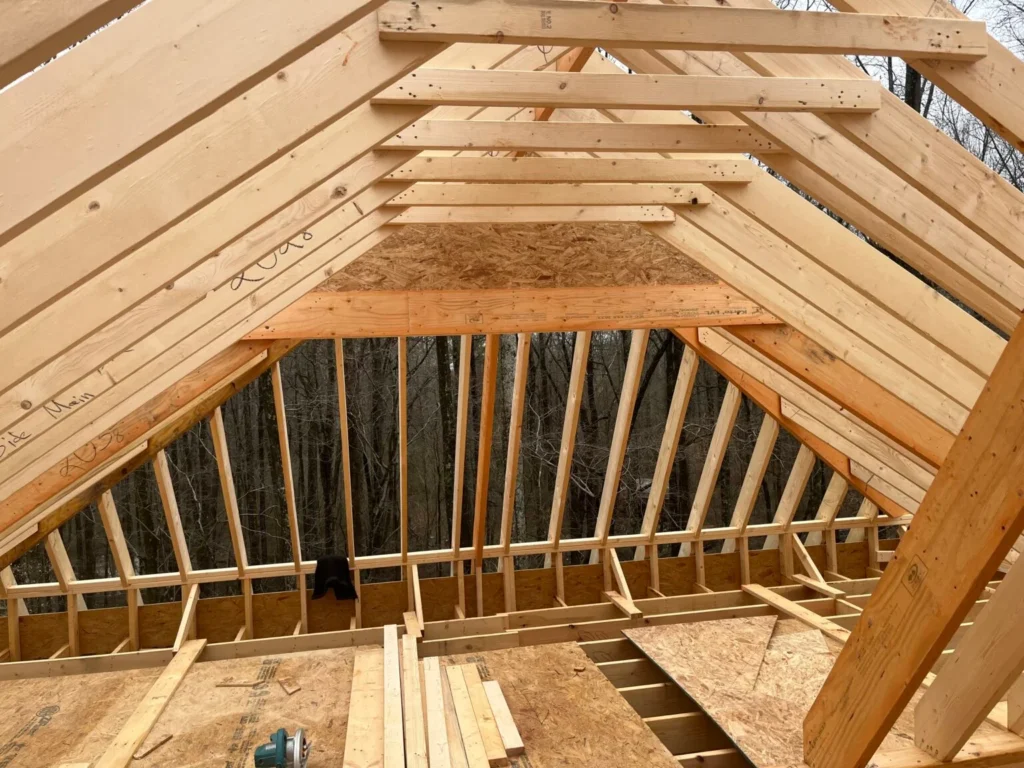
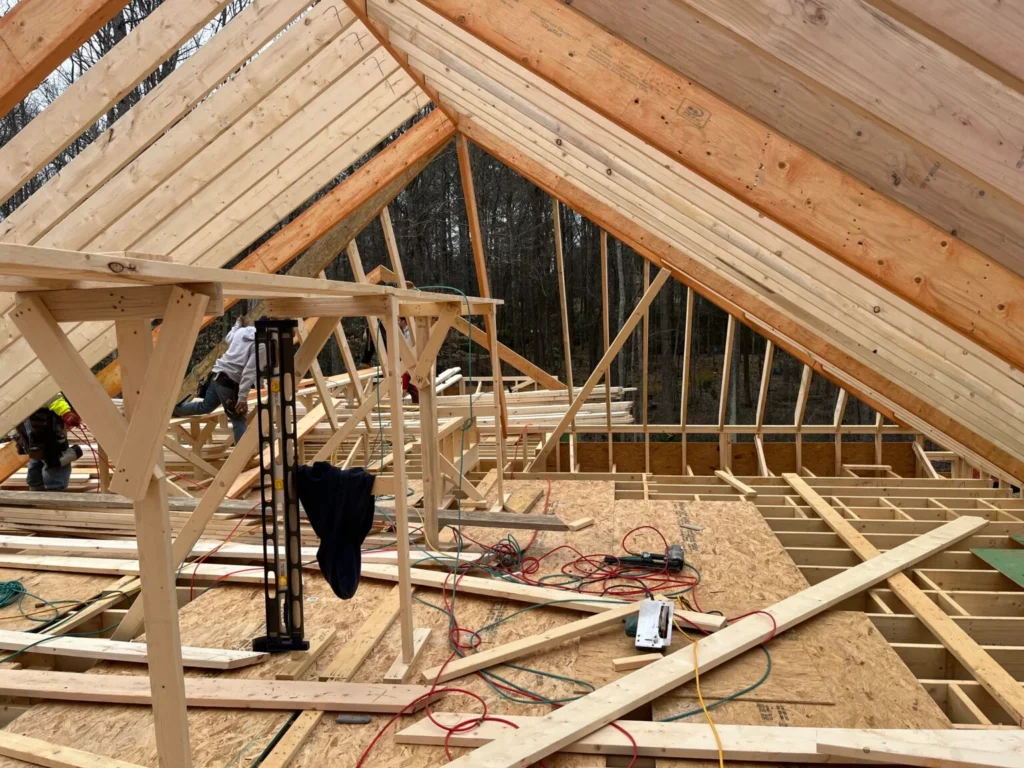
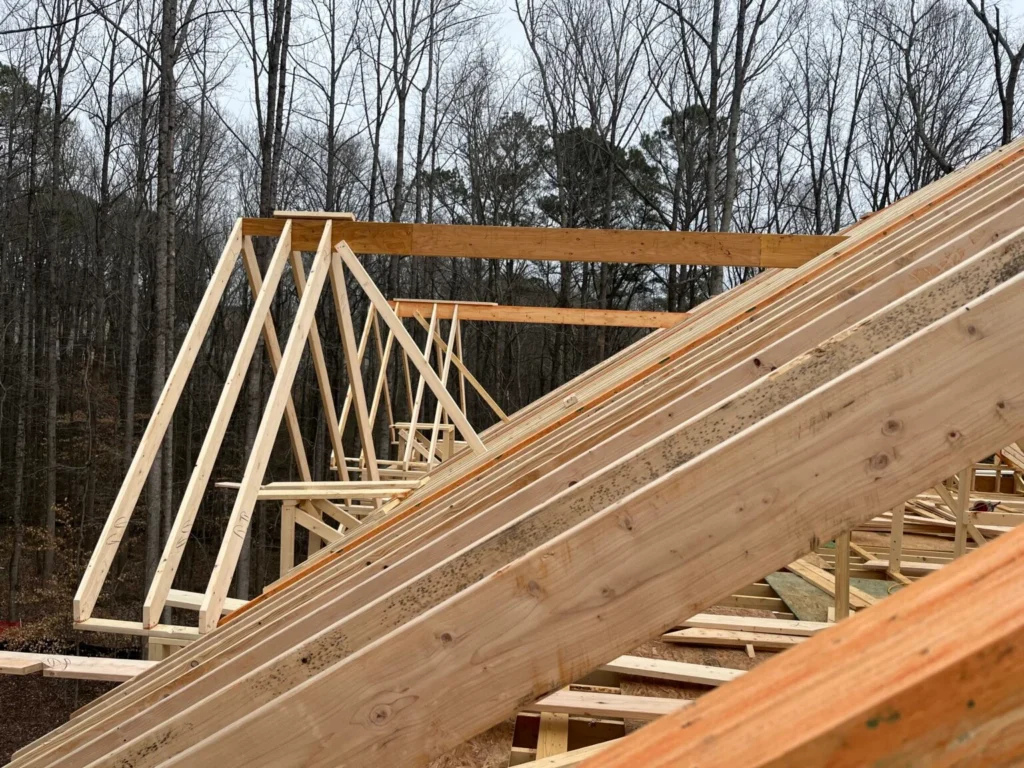
Note the pre-set kneewall height and span differences to accommodate the 8/12 and 16/12 hip roof with brick overhang. This planning ensures proper load distribution and integration with the roof structure.
Pic 14
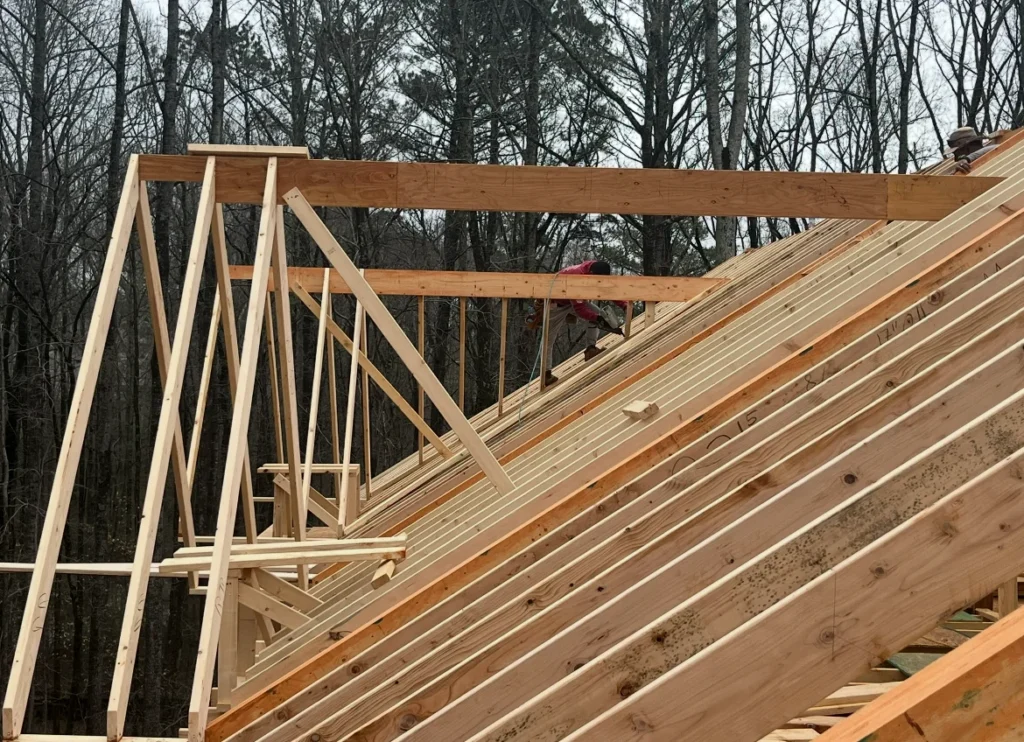
Using the provided scaffold heights and locations the scaffolding was built over a temporary layer of roof sheathing creating a safe productive work area while moving rafters into place
Pic 15
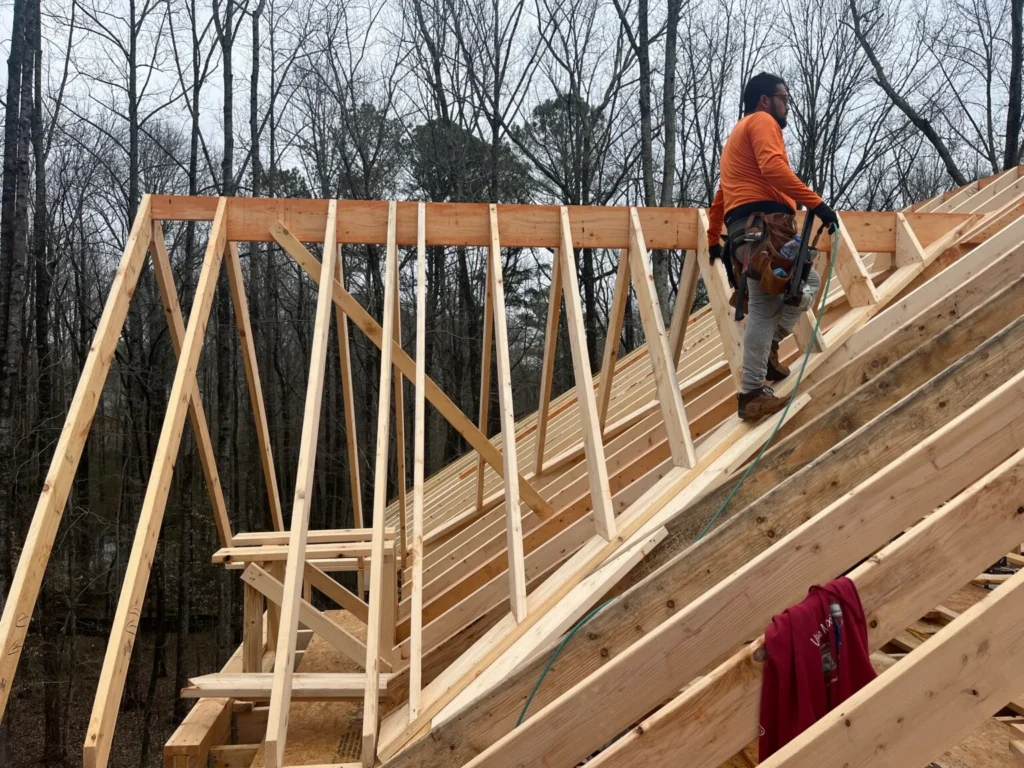
Following the Roof Framing Solutions Roof System Rafter Layout Plan the scaffolds were built, ridges and kneewalls were laid out and rafters were moved to the correct location with no confusion
Pic 16
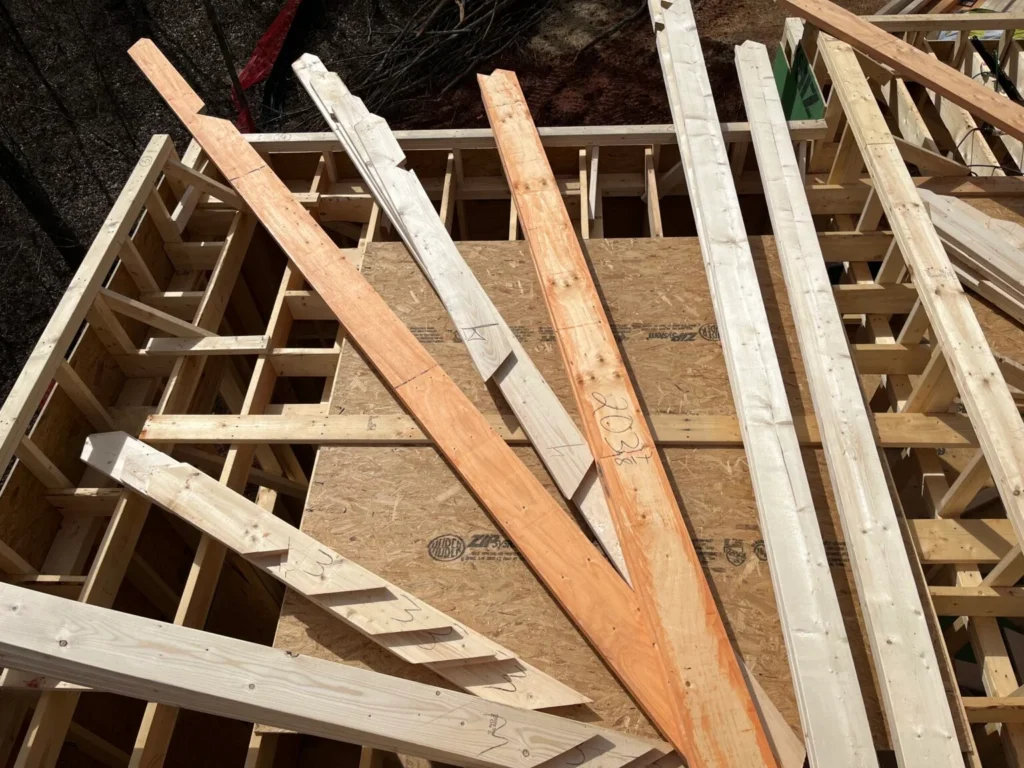
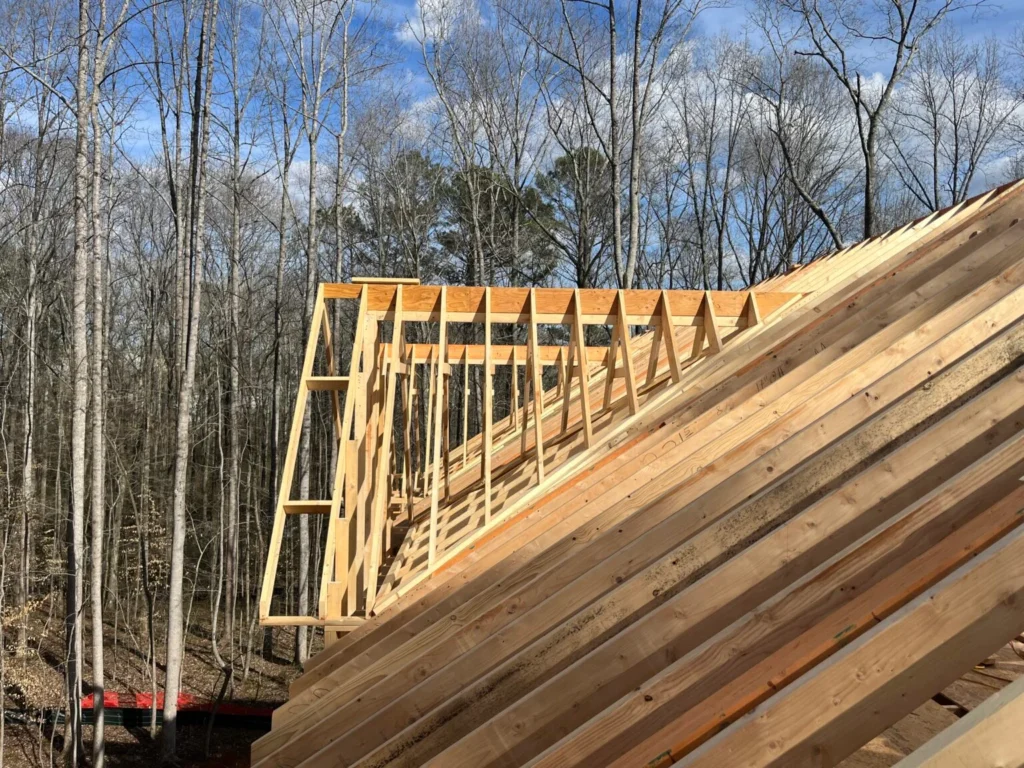
entire Pre-cut Roof System was moved and stacked in the correct location ready for assembly. Note the kneewall height differences and the Pre-cut extended Tail of the Hip to align the 8/12, 16/12 brick overhangs.
Pic 17
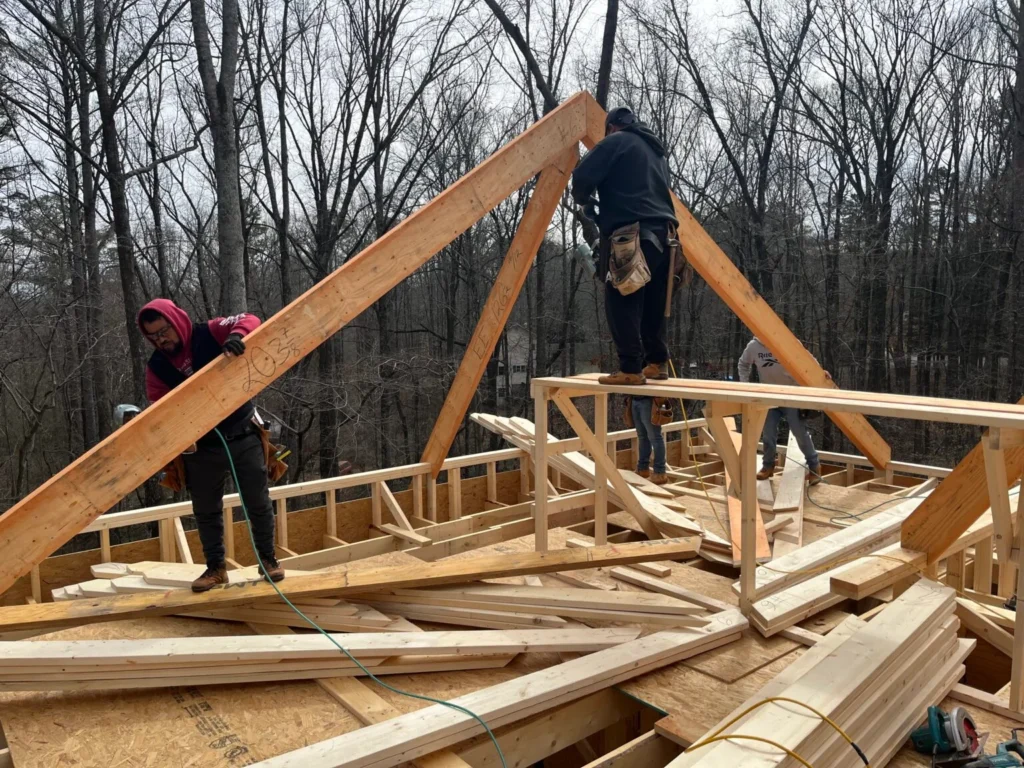
Assembling the Pre-cut 8/12, 16/12 End Common Girder Rafters. Note the Pre-cut 8/12, 16/12 Hips and Jack Rafters stacked and ready to be installed
Pic 18
Installing the Pre-cut 8/12, 16/12 Switch Pitch Hips
Pic 19
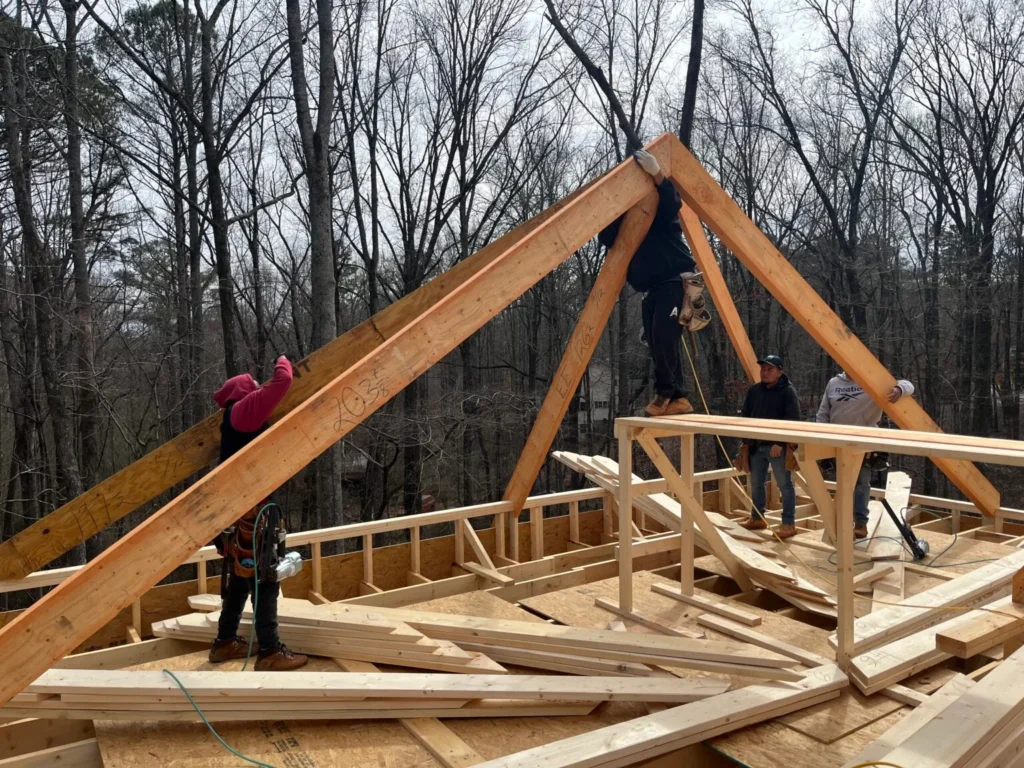
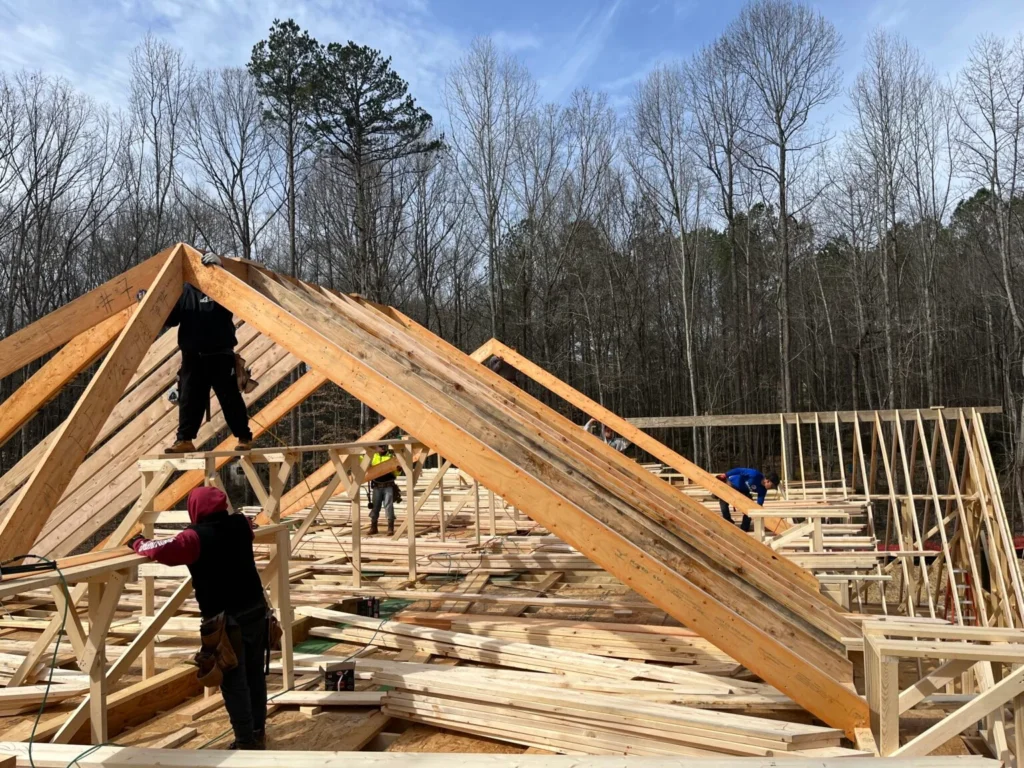
Setting the ridge and all the common 8/12 Rafters. Note all the scaffolds and kneewalls are completed and the Rafters are stacked and ready for assembly.
Pic 20
Assembling the Pre-cut 8/12, 16/12 End Common Girder Rafters. Note the Pre-cut 8/12, 16/12 Hips and Jack Rafters stacked and ready to be installed
Pic 21
All the Pre-cut 8/12, 16/12 Hips, Common and Jack Rafters installed
Pic 22
Completed 8/12, 16/12 Switch Pitch Hip Roof with the scaffold removed, reused and the Roof is ready for sheathing
Pic 23
With a completed section of Roof and the Pre-cut Rafters already in place, the crew started the next section of Roof. Here they are installing the Pre-cut 8/12, 12/12 Hip with Jack Rafters ready to be installed
Pic 24
While the Pre-cut Hips and Jack Rafters are being installed the 8/12 Common Rafters are filled in and another Roof Section is being started. Note the stacks of Rafters organized and in place for the entire Roof System
Pic 25
Having all the Pre-cut Rafters in place eliminates any loss of production when setting up the Roof. Here all the 8/12 Common Rafters and the 8/12, 12/12 Jack Rafters have been installed. Note the previous Roof in the background
Pic 26
On the opposite end of the same Roof the 8/12, 16/12 Hips and Jack Rafters have been installed completing 90% of an 8/12, 12/12, 16/12 Triple Switch Pitch Hip Roof. Note (2) things: All Pre-cut Rafters are stacking above the common 16” layout and the next Roof being set up in the background
Pic 27
With the Roof in the background being filled in and the Main body being completed, the Coller Ties are also being installed so the scaffolds can be removed to stock for the Roof sheathing
Pic 28
With the Coller Ties installed and the scaffold removed the Rafters have been straightened with catwalks and are being prepped for Roof sheathing
Pic 29
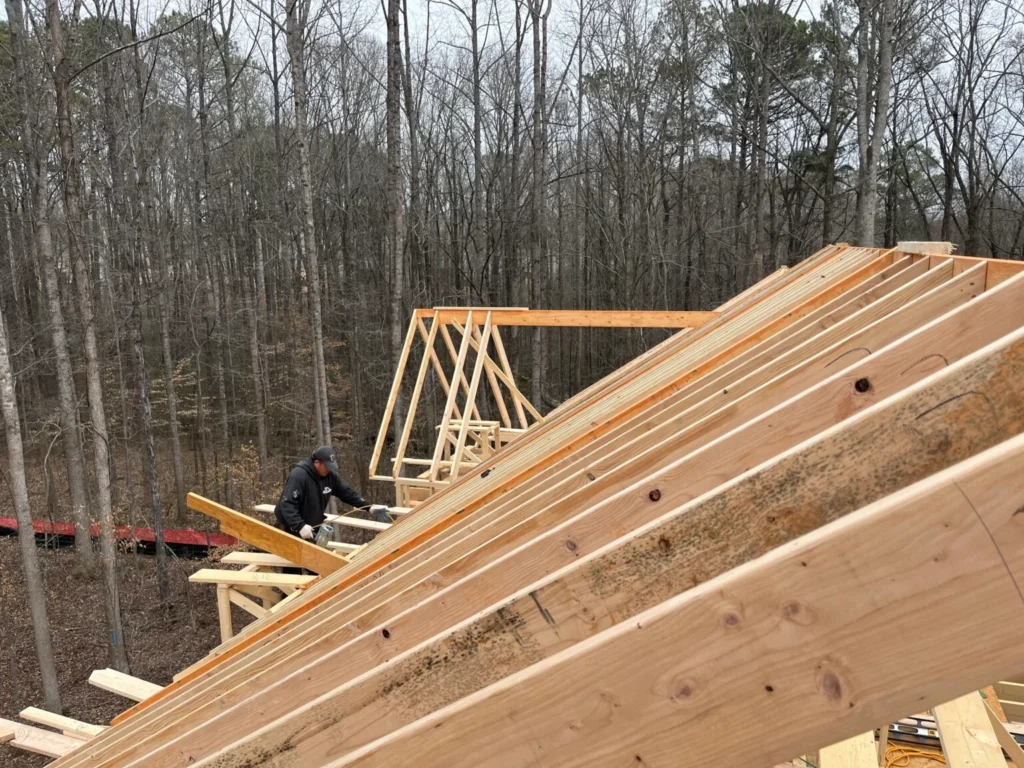
Now with the Main body of the Roof completed the (2) Front Secondary Roofs are being set up. Note the “No Tails “on the Rafters as they are Radius Tails
Pic 30
Both 16/12 Gables have been set, plumbed and ready to be filled in. Note the end Rafter on the inside set to stud up a wall to insulate with the Main body of the House
Pic 31
The first set of Pre-cut 8/12, 16/12 Switch Pitch Valley Jack Rafters being installed on a Pre-cut 8/12, 16/12 Valley Pad
Pic 32
First completed Secondary 8/12, 16/12 Roof connection. Note the continuous 16” layout with the Pre-cut Common and Jack Rafters. Also note the Valley blocking in the Lower Roof for solid Roof sheathing nailing
Pic 33
Two completed 16/12 Secondary Gable Roofs on an 8/12 Main Roof ready for sheathing
Pic 34
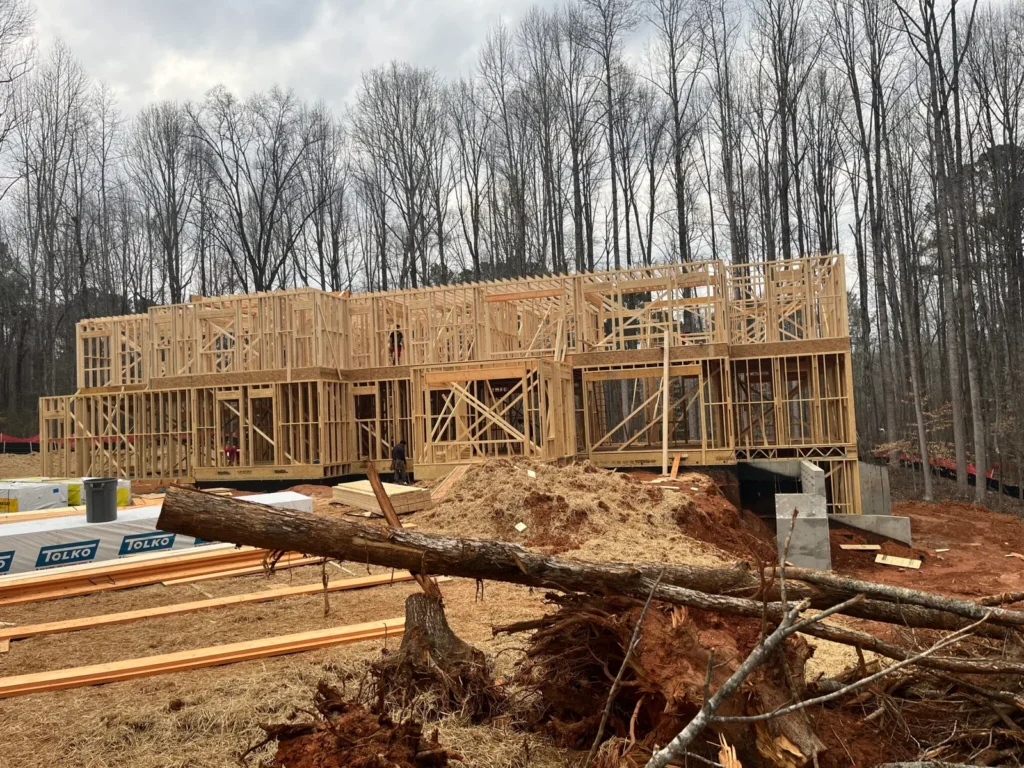
Front elevation at the end of the first day of roof assembly with 90% set and filled in. Note the upper middle secondary 16/12 Gable being filled in as shown in previous pictures
Pic 35
Rear elevation at end of the first day of Roof assembly with 90% filled in. Notice the area used for cutting and staging the Roof is now being used by another contractor
Pic 36
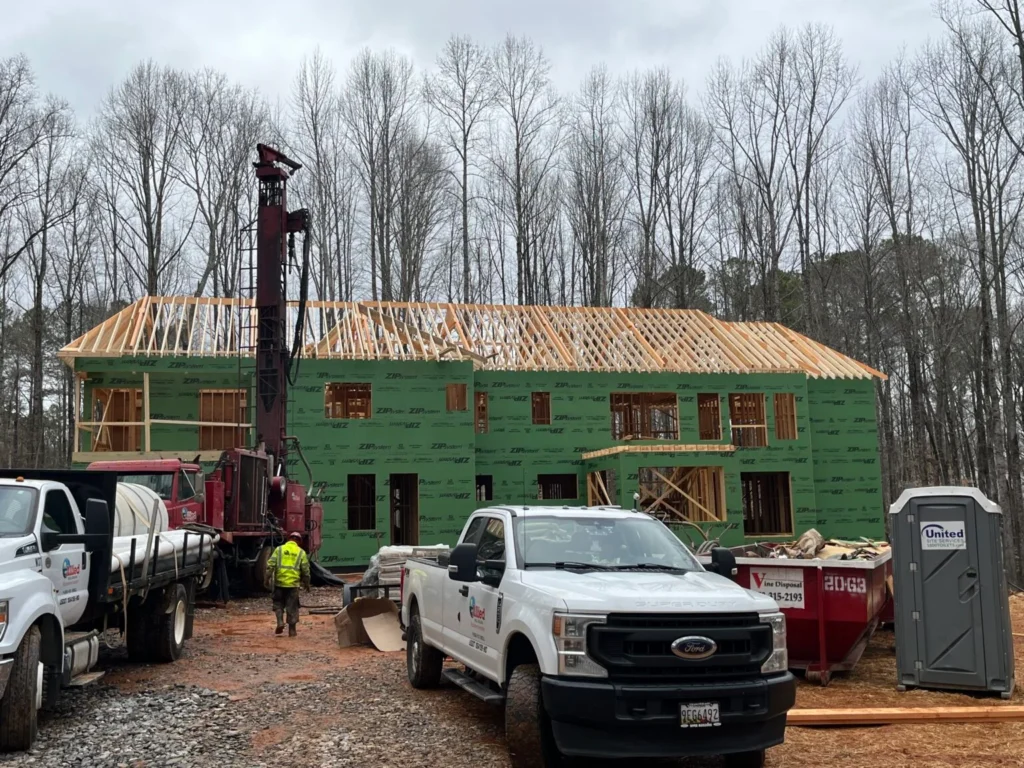
The end of the third day of Roof assembly. Fully decked and ready to be “Dried In’ by the Roofing crew. Note the Pre-cut Radius Tails on the Front Gables and the Upper Gable Radius Tail alignment with the Straight Tails of the Main Roof
Pic 37
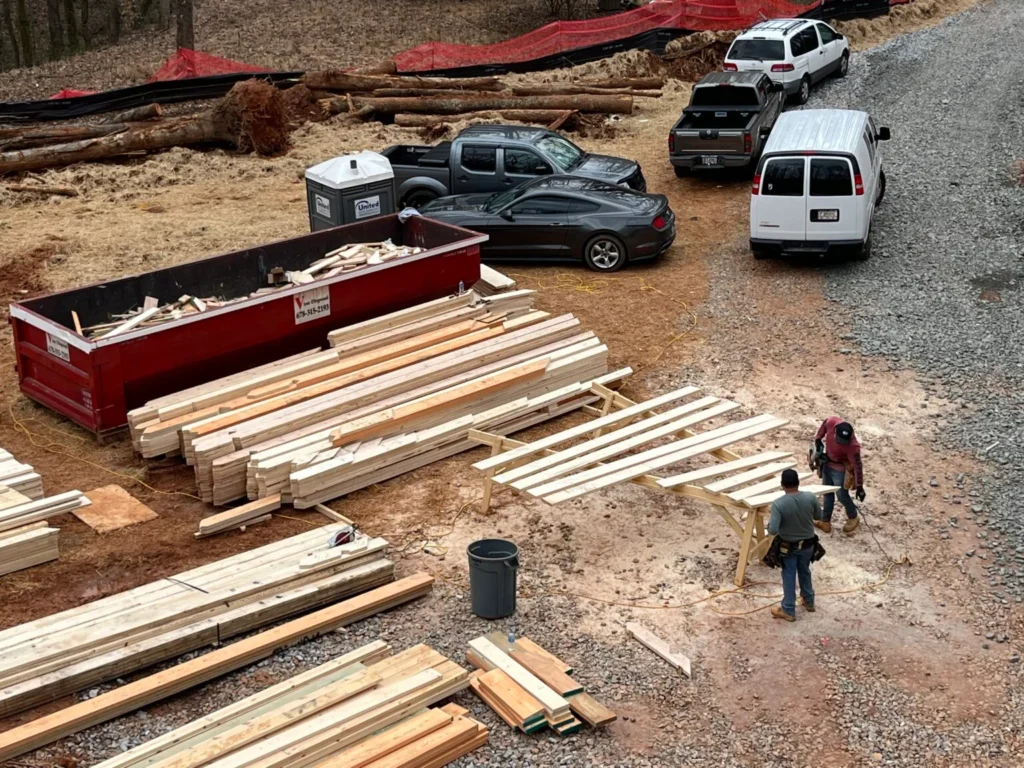
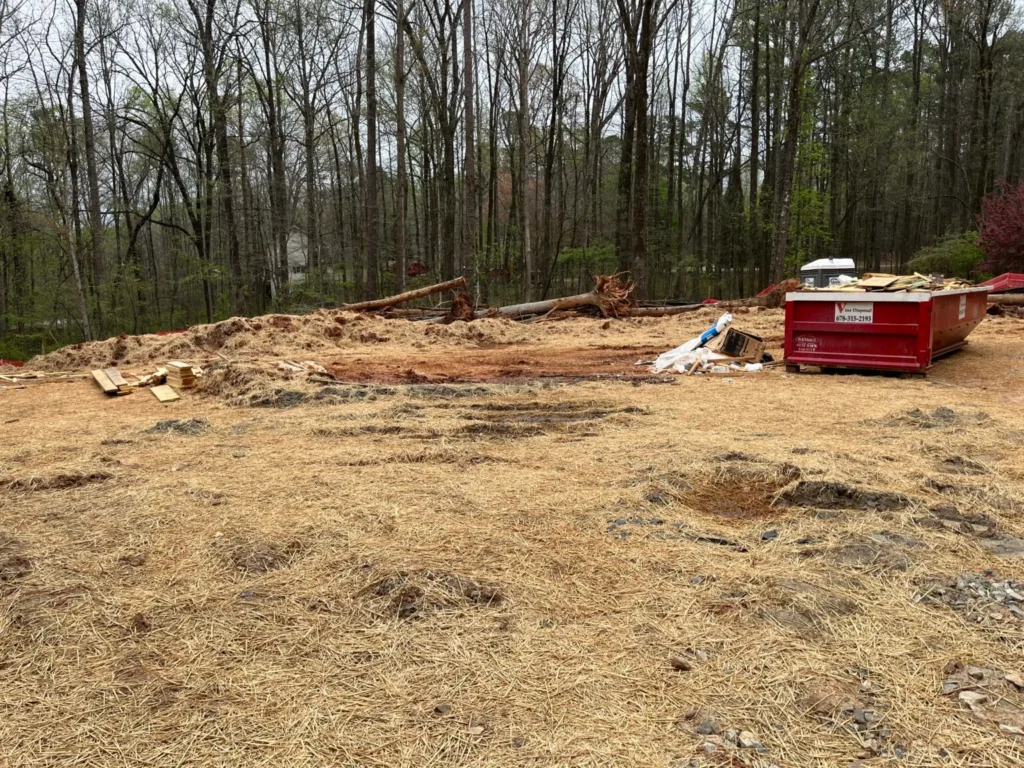
The Roof cutting and staging area AFTER the Roof has been cut. Using the Roof Framing Solutions Method gives Smarter Cost Control with Material and Waste Management. This eliminates huge waste piles and stacks of over ordered lumber waiting for a return pickup taking up valuable space needed for other contractors
Summary
Using the Roof Framing Solutions method the Builder received a complete, accurate Roof Framing Material List to have an apples to apples estimate from numerous lumber suppliers and was able to lock down a firm cost for the Homeowners. The lumber supplier was the able to order anything needed ahead of time, fill the entire order and have ready for a scheduled delivery. With the delivery the Framer received the Roof Framing Material Layout Plan, Roof System Rafter Cut list and the Roof System Rafter Layout Plan with all the information needed, written in The Framers Language, to prep, organize, cut, set up and build the roof system as effectively as possible in a clean, safe productive jobsite. With the material savings and having a brace free open attic the Homeowners were able to re-direct the savings back into the house and gain:
Floor system at the attic level
1,030 square feet of finished area with 9’ ceilings and 2 added Dormers